Friday, June 21, 2019

My Best Easy Banana Bread Recipe!!

Hey guys!! As always I hope you all are doing great!
Today I have such a treat for you!
My favoirtie moist and delicious banana bread recipe! Easy to make, no need for a mixer! Ripe bananas, butter, sugar, egg, vanilla, baking soda and flour!

Banana Bread

This banana bread has been my most popular recipe for years! And it is always the one I go to if I need a great loaf of banana bread everyone is going to enjoy.
Why? Because it really is the best banana bread recipe, period. You can mix everything in one bowl, you can very the amount of sugar or bananas. And the secret to its great flavor? (Melted butter)

The beauty of this banana bread recipe is you don't need a fancy mixer! A mixing bowl, a fork to whisk the egg and a sturdy spoon to mix the batter are all you need. The sugar amount is flexible. The original recipe called for a cup of white sugar, but most people, including me, do just fine with 3/4 of a cup, and many re happy with a 1/2 cup! 
(I like this option also because if you're running low on sugar and you don't quite have enough for the amount you want to put in, your safe because it is still going to take amazing!)

You can toss in a cup of chopped nuts, raisins, or chocolate chips if you want, or put the batter into muffin tins and make banana nut muffins instead. You can even go a step further and make chocolate banana bread! Yum!
  • Wondering how to freeze, store and thaw your banana bread? Click here for all the ins and outs on how to keep your banana bread at its best!
Banana Bread Recipe.
Prep time: 10 minutes. Cook time: 55 minutes. Yield: Makes one loaf.

No need for a mixer for this recipe!
Cleen-up is easy too, if you want you can mix everything in one mixing bowl.

The best bananas to use for banana bread are those that are over-ripe. The yellow peels should be at least half browned, and the banana inside squishy and browning. 

Ingredients: 
  • 2 to 3 very ripe bananas, peeled (about 1 1/4 to 1 1/2 cup mashed)
  • 1/3 cup melted butter, unsalted or salted
  • 1 teaspoon baking soda
  • pinch of salt
  • 3/4 cup sugar (1/2 cup if you would like it less sweet. 1 cup if more sweet)
  • 1 large egg, beaten
  • 1 teaspoon vanilla extract
  • 1 1/2 cups of all-purpose flour
Instructions:

1. Preheat the oven to 350 F (175 C)
and butter a 4 by 8 inch loaf pan.

2. In a mixing bowl, mash the ripe bananas with a fork or (I've found a potato masher works great) until completely smooth. Stir the melted butter into the mashed bananas. 

3. Mix in the baking soda and salt. Stir in the sugar, beaten egg, and vanilla extract. Mix in the flour.

4. Pour the batter into your prepared loaf pan. 
{Something a little extra I do is sprinkle a little sugar on the top of the batter just to give the bread a sweet crunch on top} Bake for 50 minutes to 1 hour at 350 degrees. (175 C)
or until a tester inserted into the center comes out clean.

5. Remove from oven and let cool inthe pan for a few minutes. Then remove the banana bread form the pan and let cool completely before serving. Slice and  serve. (A bread knife helps to make slices that aren't crumbly.)

If you decide to make this recipe please snap a pic and leave me a comment down below! I would love to hear what you think!
Until next time! Take care!
Angela R.


How To: Lion Brand Mandala Yarn Webster Scarf!


Hello everyone! I hope you all are having a wonderful day!
Are you a part of the Lion Brand Mandala Yarn craze? I'm sure if you've browsed the latest Instagram post of your favorite maker, or if you're a part of a crochet Facebook group. Then I know you have likely seen the gorgeous Mandala cakes!!
There are so many color options and the amount you get is incredible! The texture of the yarn is super soft and it glides easily through your hands too! No scratchy or too slippery material here.

If you want to get your hands on Mandala for yourself or if you're looking for a specific color, head over to the Lion Brand site by CLICKING HERE!!

There are 16 different colors and each one of them is equally as beautiful as the last.
Before you become to intimidated by this pattern, please note, it just LOOKS hard but it is super easy!


Image result for webster scarf pattern

Image result for webster scarf pattern

Materials:
  • 1 Mandala Yarn Cake.
  • H (5mm) Hook.
  • Tapestry Needle.
  • Scissors

Pattern:
  • Cluster Stitch Pattern.
*YO, insert hook into ST and draw up a loop to height of a DC, YO and draw through 2 loops; rep from * twice more in the same ST, YO and draw through 4 loops. CL made

Ch 51

ROW 1 - In the 5th CH from the hook place a DC.
CH 1 and skip the next ST. DC into the next ST.
Repeat from * all the way across ending with a DC in the last ST. *
CH 4. Turn.

Row 2 - (Chain 4 counts as DC - CH 1)
Place a DC into the next DC. CH 1. DC into the next DC. *CH 5 and skip over the next 2 DC.
Place a CL (cluster) into the next DC. CH 5 and skip the next 2 DC. DC-CH 1 into the next 2 DC.
Repeat from * all the way across ending with a DC in the 3rd CH of the previous row's CH 4. CH 4. Turn.

Row 3 - (Chain 4 counts as DC - CH 1)
Place a DC into the next DC. CH 1.
DC into the next DC. *CH 4. SC around the CH 5 apace. CH 1. SC around the next CH5 space. CH 4.
DC - CH 1 into the next 2 DC sts.
Repeat from * across ending wih a DC in the 3rd CH of the previous rows CH 4. CH 4. Turn.

Row 4 - (Chain 4 counts as DC - CH 1)
Place a DC into the next DC. CH 1.
DC into the next DC. *CH 4. SC into the next SC. SC into the CH 1 space. SC into the next SC. CH4. DC - - CH 1 into the next 2 DC sts. Repeat from * across ending with a DC in the 3rd CH of the previous rows CH 4. CH 4. Turn.

Row 5 - (Chain 4 counts as DC - CH 1)
Place a DC into the next DC. CH 1. DC into the next DC. *CH 5. Skiip the first SC. CL into the next SC.
CH 5 and skip the next SC. DC - CH 1 into the next 2 DC sts. Repeat from * across ending with a DC in the 3rd CH of the previous rows CH 4. CH 4. Turn.

Row 6 - (Chain 4 counts as DC - CH 1)
Place a DC into the next DC. CH 1. DC into the next DC. CH 1 *DC/CH 1/DC/CH 1 around the CH 5 space. DC into the top of the CL stitch. CH 1. DC - CH 1 into the next 2 DC sts.
Repeat from * across ending with a DC in the 3rd CH of the previous rows CH 4. CH 4. Turn.

Row 7 & 8 - (Chain 4 counts as DC - CH 1)
Place a DC intothe next DC. *CH 1. DC into the next DC. REpeat from * across ending with a DC in the  3rd CH o fthe previous rows CH 4. CH 4. Turn.

You will continue with this repeat (rows 2-8) until you run out of yarn! Super simple and easy!

Be sure you block your piece. The reason is so that these gorgeous spidery  stitches can look their best! If you make a Webster Mandala scarf of your own, be sure to use the tag #heavenlyhandmade so we can see your gorgeous work!

Thanks everyone! See you next time!
Angela R.

Tuesday, June 4, 2019

Hot Craft Ideas to Sell! 10 Crafts to Sell and Make From Home!


Hello my beautiful butterflies! I hope you are all having a wonderful day!

Selling handmade crafts can be incredibly profitable. I compiled a list of 10+ hot craft ideas to sell to give you some ideas of all the amazing things adults can make and sell form home.

All of these projects are super easy to do but look pretty enough for people to want to buy them.

You can create some of these crafts in less than an hour and sell them in places like weekend markets, craft fairs or even Etsy!

These homemade craft ideas to make and sell are also perfect for people who aren't very crafty as most of these crafts are super easy to do!

I personally know a few people who make a full-time income selling on Etsy. It could be the pefect job for an introvert who wants to work from home and work at their own pace. So pick your favorite craft ideas to sell and make them today. Most of the supplies to make these crafts can be found at your local craft store or Amazon!

1. Clay Jewelry Dishes.


Source: Hello Glow

2. Makeup Brush Roll.


3. Mini Spring Succulent Planters.


4. Pallet Wood Planter.


5. Lemon + Peppercorn Body Scrub Bars.


Source: Burkatron

6. Mason Jar Cozies.
These mason jar cozies are perfect for keeping your hands warm with an ice cold drink, or cool while having a steaming cup of coffee! 


7. Ten Minute Lip Balm.


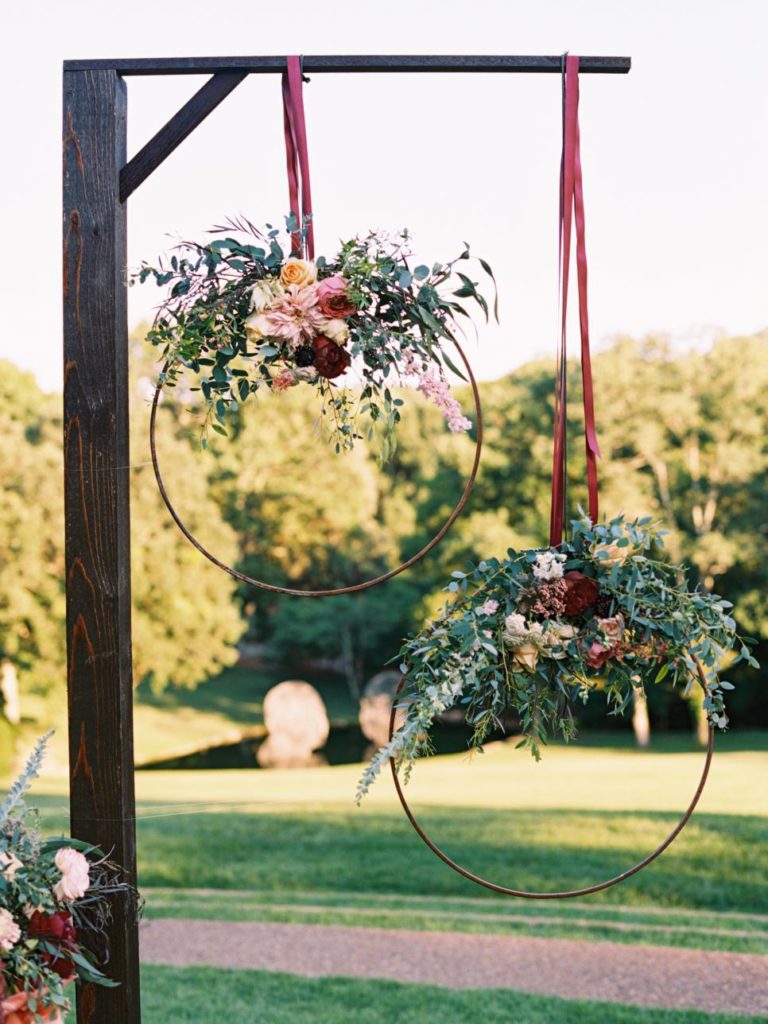
8. Embroidery Hoop Wreaths.

Making Hoop Wreaths for Spring|floral hoop wreath|hoop wreath|how to make hoop wreath|diy hula hoop wreath|wedding hoop wreath|spring hoop wreath|wedding hoop wreath|embroidery hoop wreath|spring crafts|kids crafts|spring diy|spring cleaning|spring makeover|Hallstromhome


9. Bandana Wrapped Bracelets.

Bandana-Wrapped Bracelets


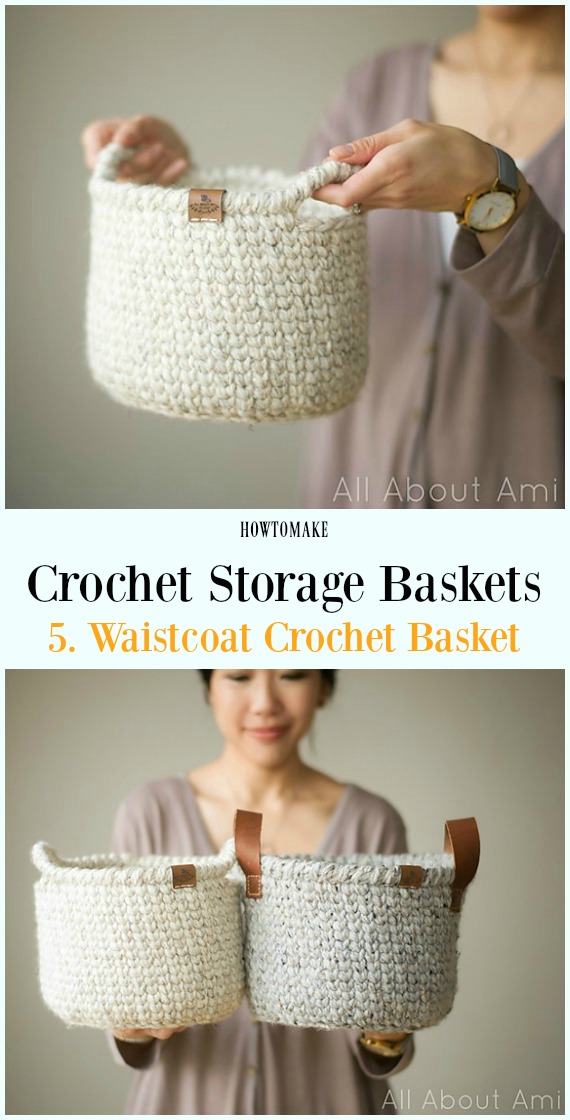
10. Crocheted Storage Baskets.

Waistcoat Crochet Basket Free Pattern - Storage #Basket; Free #Crochet; Patterns

Source: How To

Thank you everyone for joinging me today!
I hope you all found something that you can use to make from home! I know these would be great to sell on Etsy!! 
Until next time! 

Angela R. 


Friday, May 24, 2019

How to Make a Crocheted Shawl!


I hope you're all having a great and it's great for beginners!

I think this is so chic looking, and it keeps you very warm!
I used Lion Brand Homespun Thick and Quick yarn. This yarn is so beautiful and fairly easy to work with, if you are a beginner it might give you a little trouble only because it is harder to see stitches, but you can always feel the stitch with your fingers. 

This yarn comes in all types of colors and they have striping yarn, so the sky is the limit!
Okay, enough with the chit chat, here's the pattern!!

Supplies: 
(For the yarn I used it called for a size N/10 mm hook, but depending on the yarn you are using, the size will very.)

Size N-10 mm crochet hook.
Yarn- Homespun Thick and Quick yarn. (Or yarn of your choice.)
Measuring Tape.
Scissors
Embroidery Needle.
Embellishments- I added large wooden buttons at the seam to look like it has a closure, but this is totally optional!

Pattern:

You are basically making a long rectangle. That will be sewn together when done.

You want to start out with a chain that measures 44 inches long.
(I'm going by inches because if I told you in chains depending on the yarn you might use, your shawl could be to big. This shawl fits most and will stretch.)

After making your chain, you are going to chain one and turn your work after every row.

SC back and forth until your shawl measures around 15 inches wide. This is for a standard shawl, you can make this as thin or as thick as you like. 

After your shawl measures 15 inches, you will tie off your yarn, but make sure when you cut it to leave a long enough tail to sew the shawl. 

You are going to attach one end to the side of the shawl. As seen in the picture below you will take one end and bring it around to the top side of the shawl matching the stitches together.

Thread your embroidery needle with your yarn tail. 
Sew back and forth until you get to the end and tie off by bringing your needle back through a few times to hide some of the tail, and cut the rest off. 
Besides the embellishments you are finished!!!! 
Now wasn't that easy? lol


These pictures above are of the shawl I've made and me modeling it. 
Below is the colored yarn that I used for this just in case you want the same brand and color.


This is a photo of another shawl I'm currently working on in the color Mixed Berries. I am just in love with this yarn!! I can't wait to make more things with it!

I hope you all really enjoy making this!
If you have any questions please don't hesitate to ask in the comments below!! i understand that the instructions can be a little confusing.

Thanks you! Have a great day!

Angela


Thursday, January 24, 2019

How to Crochet a Hat for Beginners!


I have fallen deeper an deeper in love with crocheting. Since I first started I have watched a lot of different tutorials and I've realized that a easier and more in depth tutorial helps a lot! And will bring your crocheting technique a long way.

When I first started out trying to crochet a winter hat, I followed a tutorial that taught me to make a hat completely different from another tutorial that I saw. The second tutorial on how to make a hat was so much easier! And the technique works out so well for me and it's not as nearly as complicated! Now you can use any type of crochet stitch you prefer, but this design for a winter hat is a no brainer! I hope you enjoy and that this takes away the fear of just starting out crocheting new things! 

I wanted this to be easy enough even for beginners to crochet. The hat is made in a flat panel so there is no need to know how to crochet in the round form. This one is probably one of the easiest crochet rib hats. 

Easy Crochet Ribbed Hat

You can adjust the length by just changing the number of beginning chains. If you don't want the brim (folded edge) to be so wide just start with fewer chains. On the other hand, if you plan to wear it as a slouchy and want it longer just begin with more chains. 

Supplies needed:

4 oz. of Medium weight yarn.

J crochet hook (6.0mm)

Scissors

Yarn needle

Measuring tape

To Begin:

Chain 40 sc in each chain beginning in 2nd chain from the hook.

Row 2- to last row: chain 1, turn work, sc (single crochet) in each stitch in the BACK LOOP ONLY.
Continue adding rows until your piece is long enough to easily wrap around you head. You can either wrap the piece around you head or simply measure the circumference of your head. When your piece can easily stretch to that length (without losing the ribbing effect) you have the crochet size. 

My head measures 21 inches. I made my piece 16 inches long and it fit around my head. You can either: 1) Stretch piece until it reaches the measurement (without losing it's ribbed look. 2) Wrap the piece around your head to see if it fits. (Not super stretched). See photos below. 

IMPORTANT: DO NOT CUT YARN...after your last row.

Rib crochet

Crochet panel around head

To finish your hat. 
Fold your panel in half and either slip stitch thru BOTH layers making sure to align your stitches. One edge will have only one loop. This is your beginning row. The other edge will have a full single crochet stitch. You want to be sure to work through both edges. If you prefer you can fasten off and leave a long tail. You can then sew both edges. Either way will work. 


Joining edges together

When you have finished joining your edges you will now fasten off. Be sure to leave a tail 3 times the length of your top edges. This will be used to gather your top edge and close off the top opening. Thread they yarn with a yarn needle. Now you will be working your needle in and out of the top edge (small stitches). When you finish pull the opening shut tightly. You can now make a small knot. 
Next, you will be working to close up any remaining opening with the remaining yarn on your needle. 

sewing top edge

top of hat

Make sure your work through the top edge (should be pulled shut now) and sew through layers to close up any remaining openings. Flip inside out and fold over your brim. You are ready to enjoy your hat!
You can also use it without folding to a slouchy beanie look.

Thank you so much for joining me today! I hope you enjoy this tutorial! 
If you have any questions please ask!
Happy Crocheting! 

Angela R.